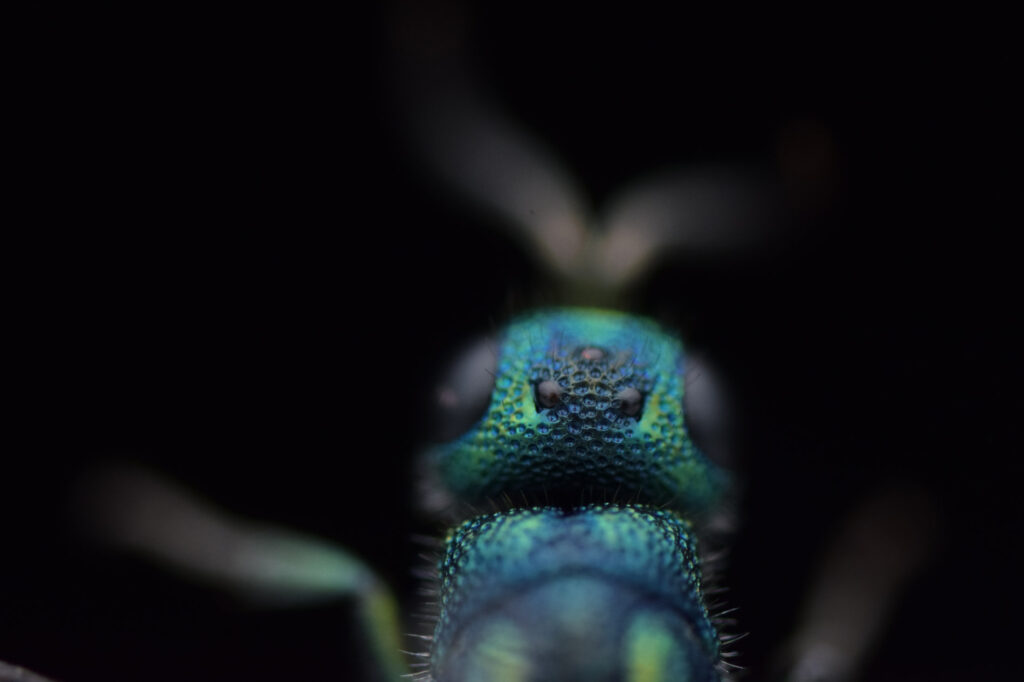
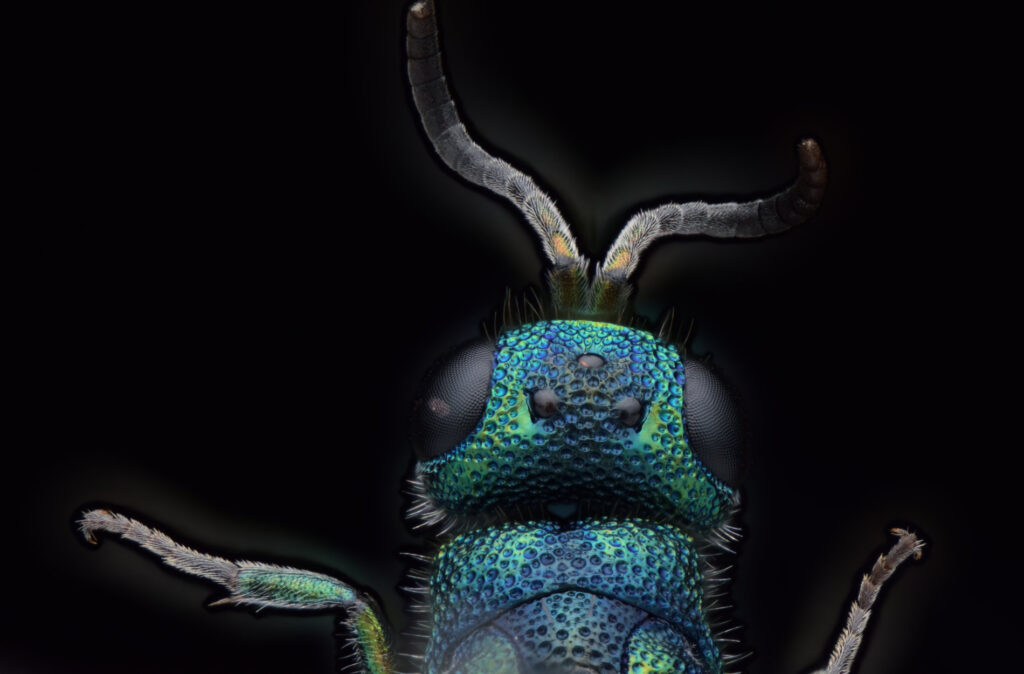
If you take a photo with a macro lens you usually have a very shallow depth of field, which means that if you focus on the ocelles of a cuckoo wasp, for example, everything that is just a little further away, for example the compound eyes, is out of focus (see Figure 1).
This depth of field varies depending on the magnification and aperture setting. The greater the magnification, the smaller the depth of field and the smaller the aperture setting (e.g. f / 2.8), the smaller the depth of field. So with selected magnification you could increase the depth of field by increasing the aperture setting (e.g. f / 22).
The disadvantage here, however, is that much less light reaches the camera sensor and the images become darker. Now lightning comes into play. With the flash you have the possibility to get sufficiently bright results even with high aperture settings. It doesn’t have to be a flash. You can also use LED panels or other lamps, whereby a flash can provide a very bright light and is therefore usually more suitable.
No matter which light source you choose, it usually leads to hard light which is visible as overexposed zones in the photo. So you have to soften your light.
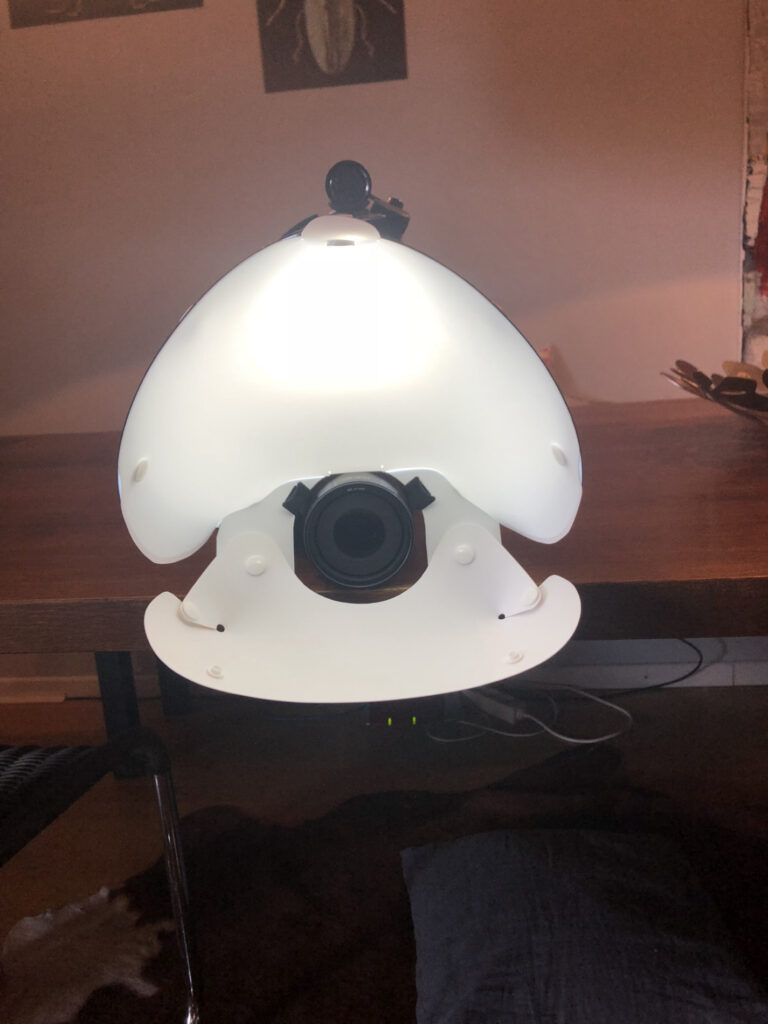
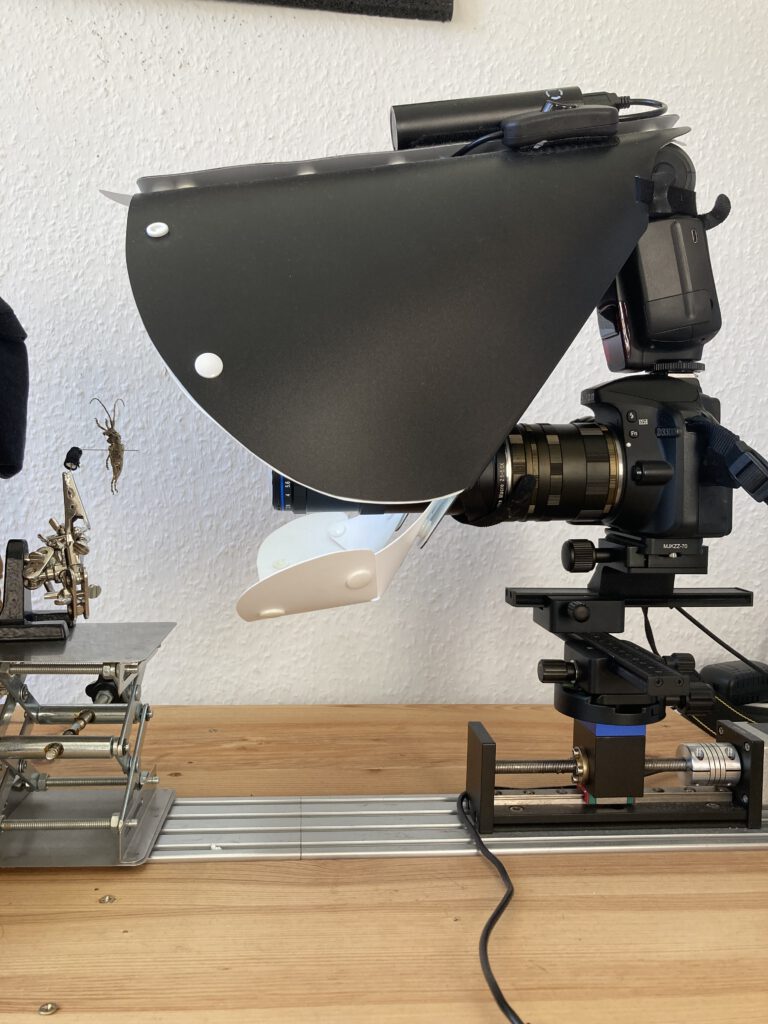
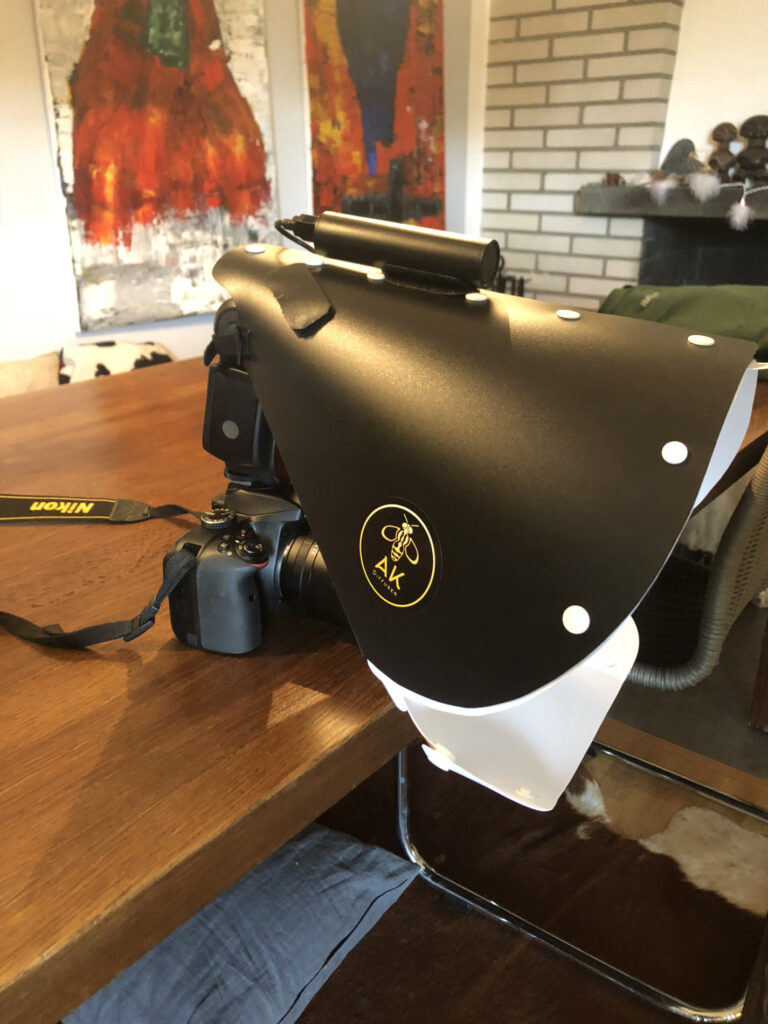
There are different approaches to this. With the flash you can use a diffuser, which is simply attached to the camera like an upturned white screen (see Figure 2 & 3).
With all other light sources, the object can be illuminated indirectly, e.g. by illuminating the ceiling and walls, or by installing a diffusing material around the insect. This could be, for example, an empty yoghurt pot (see Figure 4).
All in all, light is a very important factor in macro photography. You should try different options to see which one is best for you.
If you have prepared everything, you can start to take pictures. You start to look for the first focal point on the insect that is sharp. Now you take a picture and move the camera a little further and take another picture. This is repeated until the entire insect has been worked through to the last sharp point.
With a magnification of 2.5x-5x that can mean between 80-150 photos for a cuckoo wasp. Step lengths from focal point to focal point can often only be 0.05mm. To be able to take such small steps you need the next important component of macro photography, the macro rail.
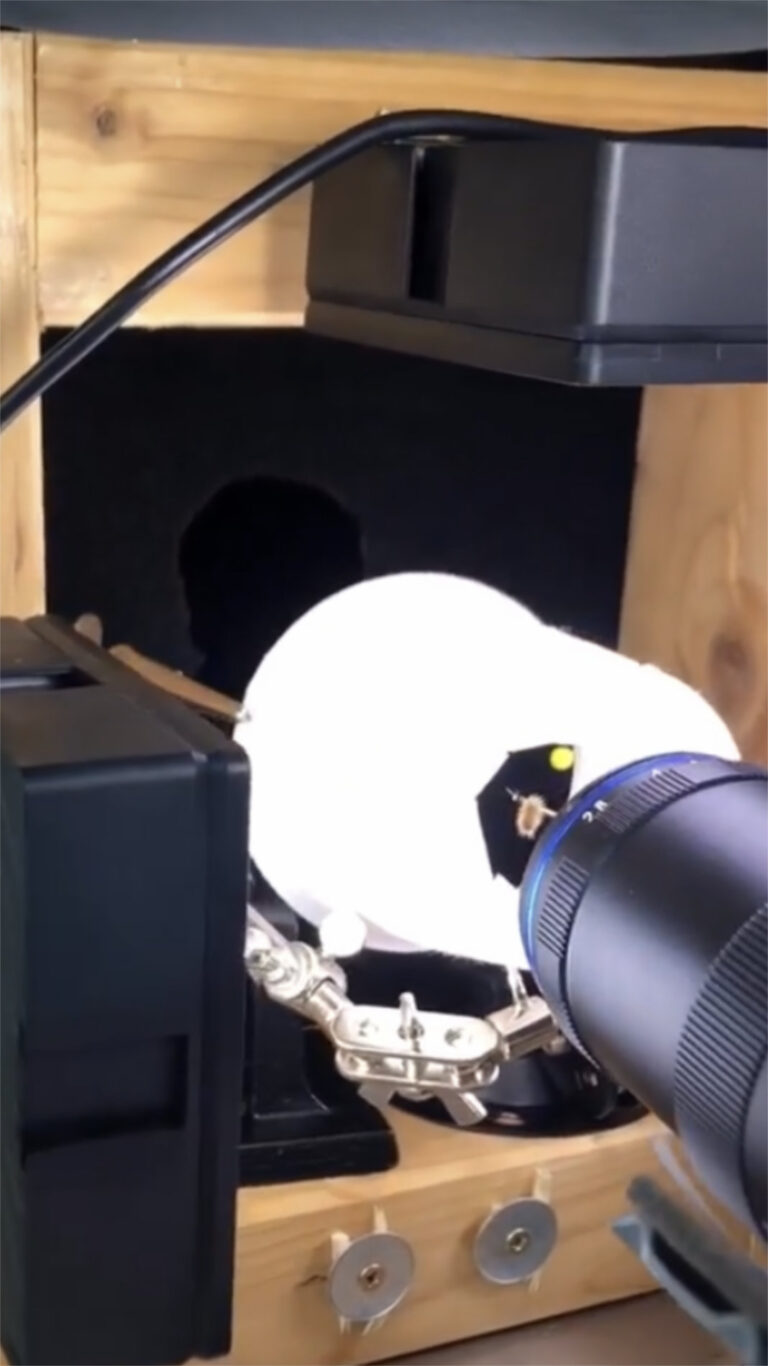
With an automatic macro rail you can set such step lengths and the rail moves the camera by these step lengths and automatically takes a photo after each step (see Figure 5).
Now the computer work begins. Programs like Helicon Focus are perfect for converting all photos into a sharp image. The photos are loaded there and the program calculates all sharp edges from all images to form an overall picture.
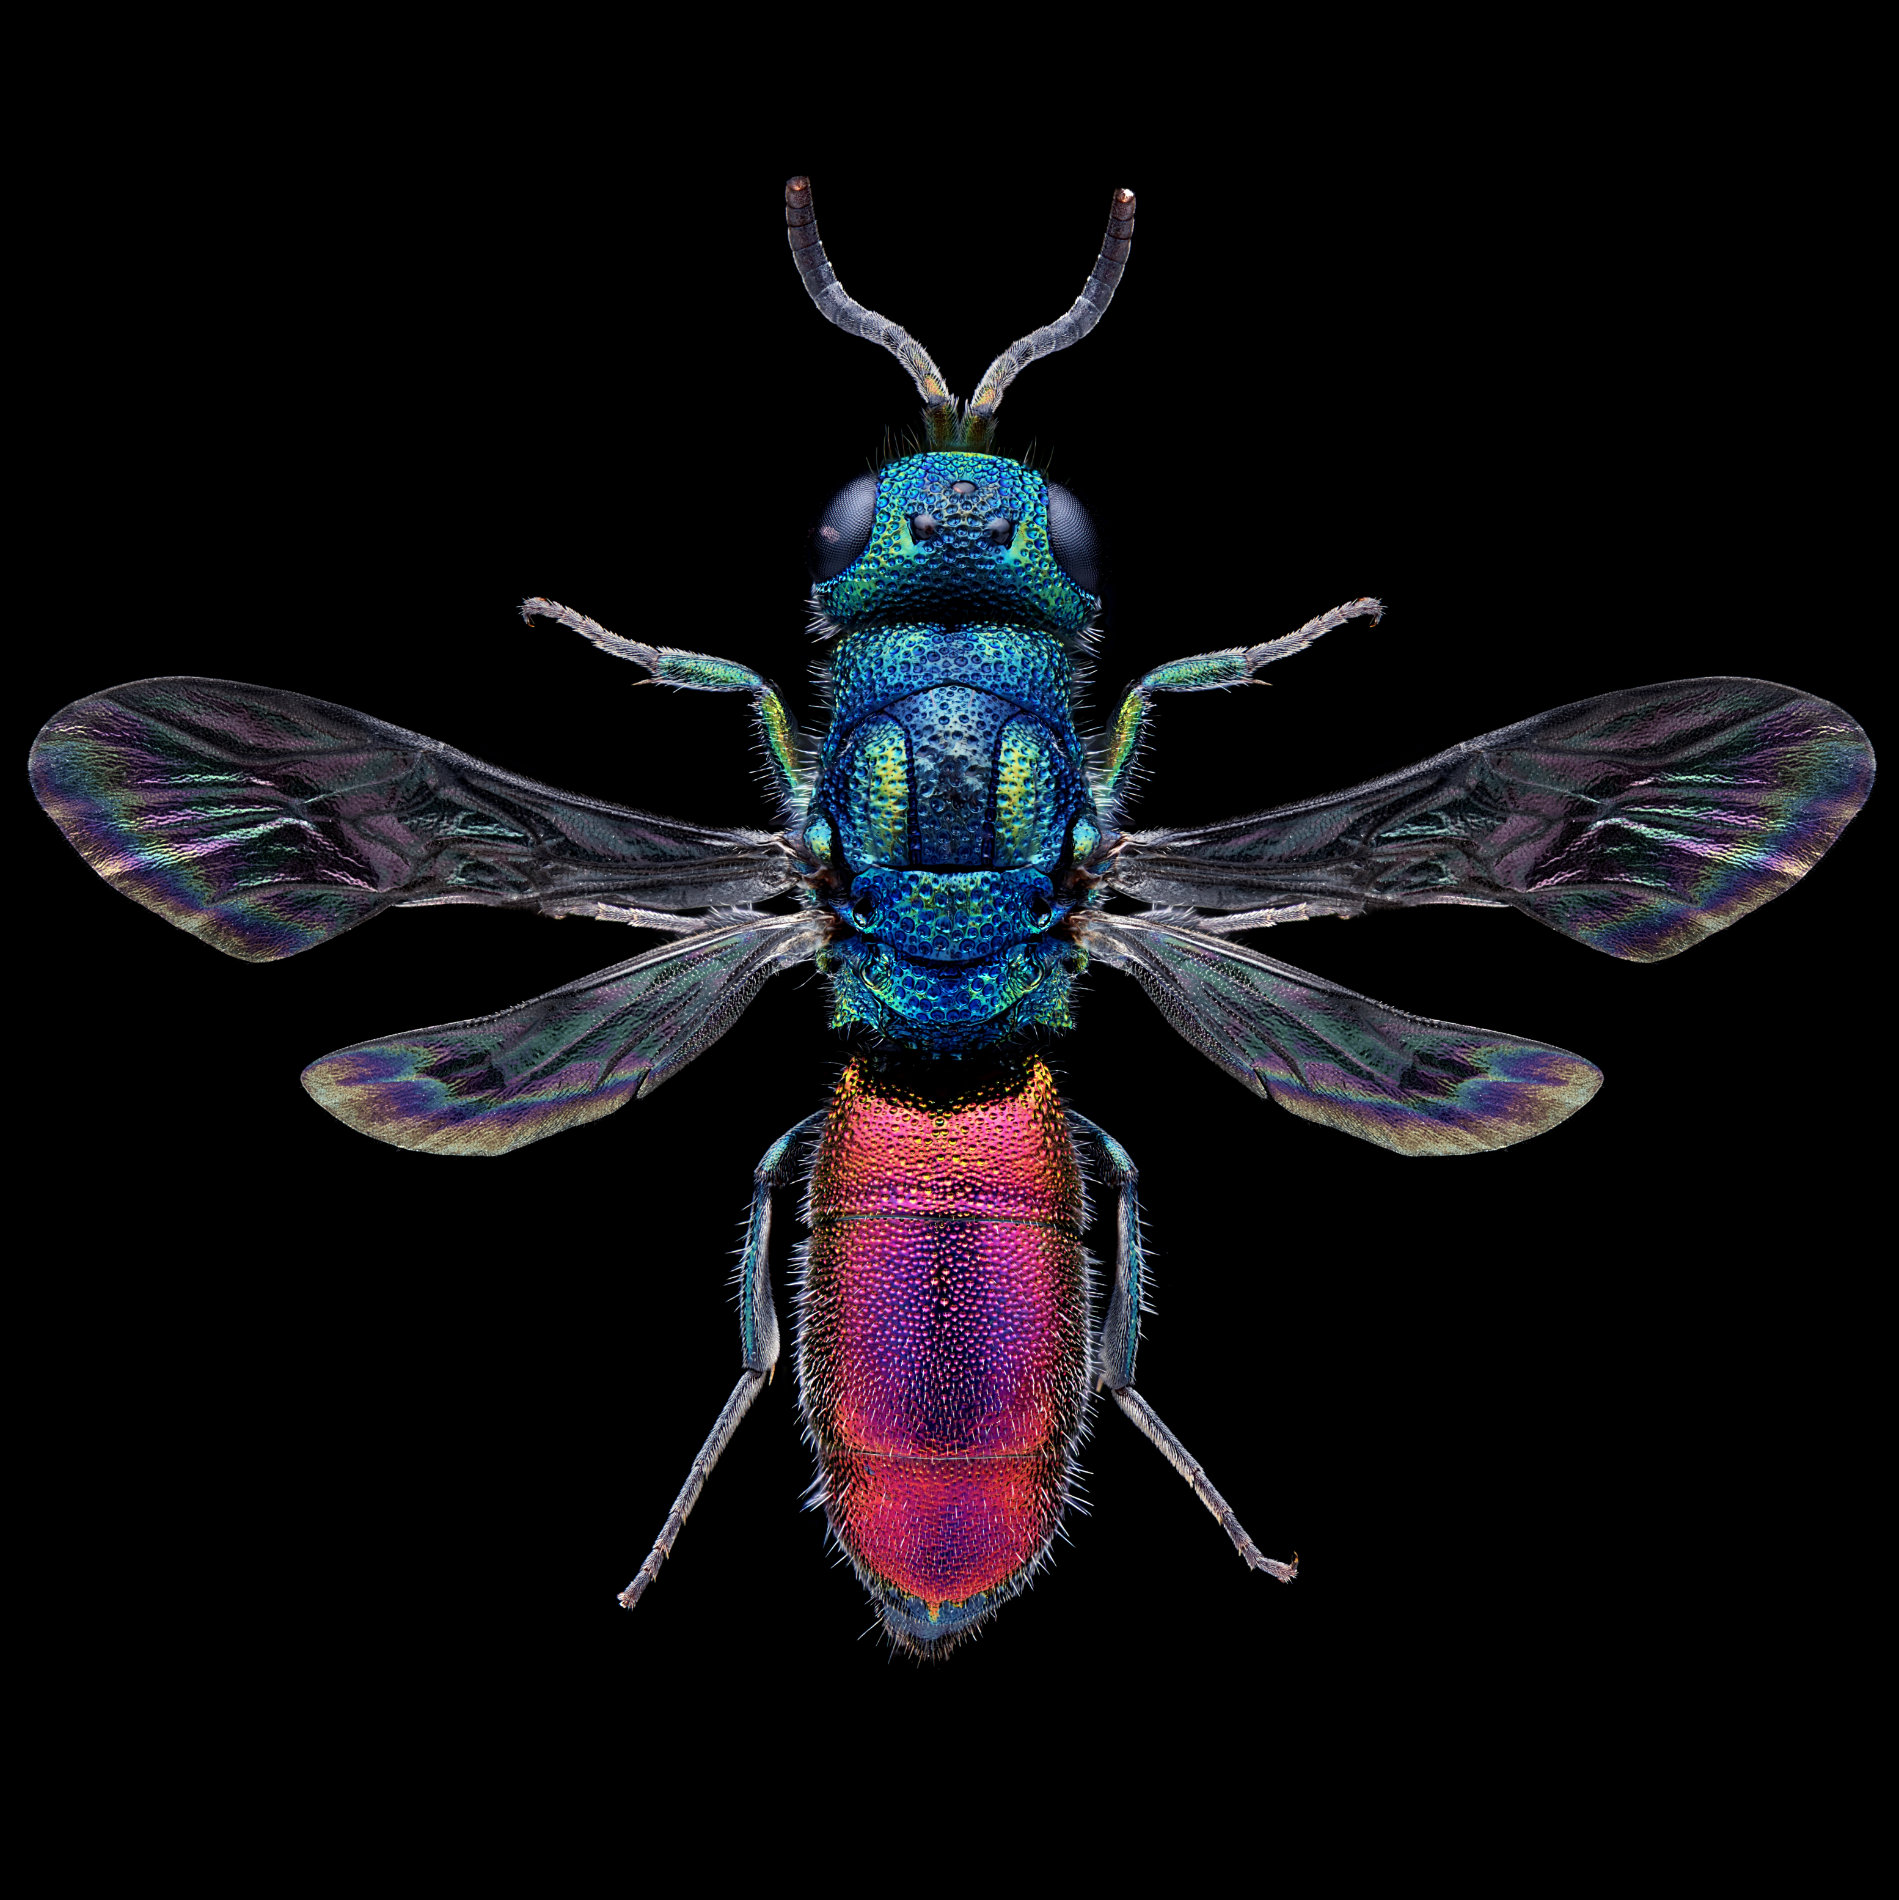
In our example, we have now finished the head of the cuckoo wasp (see Figure 6). Repeat all of these steps with the thorax and abdomen. The last step is the compilation of all body parts to form an overall picture of the complete insect. For this you can use the panorama tool of your image editing program. Now post-processing and the picture is ready (see Figure 7).
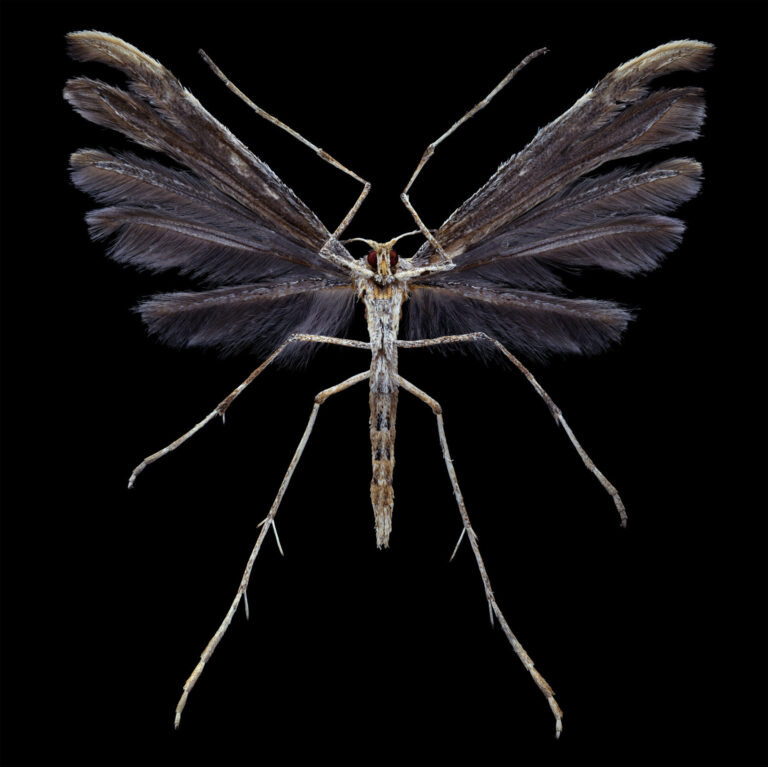
Creating such a photo is very complex and involves many individual work steps. It can take a lot of time from the alignment of the insect in front of the camera to the finished photo. If everything goes well and you opt for a resolution that is not that great, you can have your result after 1-2 hours. With higher resolutions, i.e. greater magnification for an insect of the same size, it can sometimes be 14 or more hours (see Figure 8).